
How to Install RO Water Purifier at Home (Step-by-Step)
Installing an RO water purifier at home is a straightforward process that most handy homeowners can complete in 2–3 hours. While manufacturers recommend professional installation, understanding the process helps you verify the job is done correctly — and save the Rs 500–1,500 installation charge if you are comfortable with basic plumbing.
| Tools You Will Need |
| Drill machine with 8mm and 25mm drill bits |
| Adjustable spanner / pipe wrench |
| Teflon tape (plumber’s tape) — 2 rolls |
| Bucket and towels for water spillage |
| Measuring tape and pencil |
| Wall anchors and screws (usually included with purifier) |
| Small flat screwdriver |
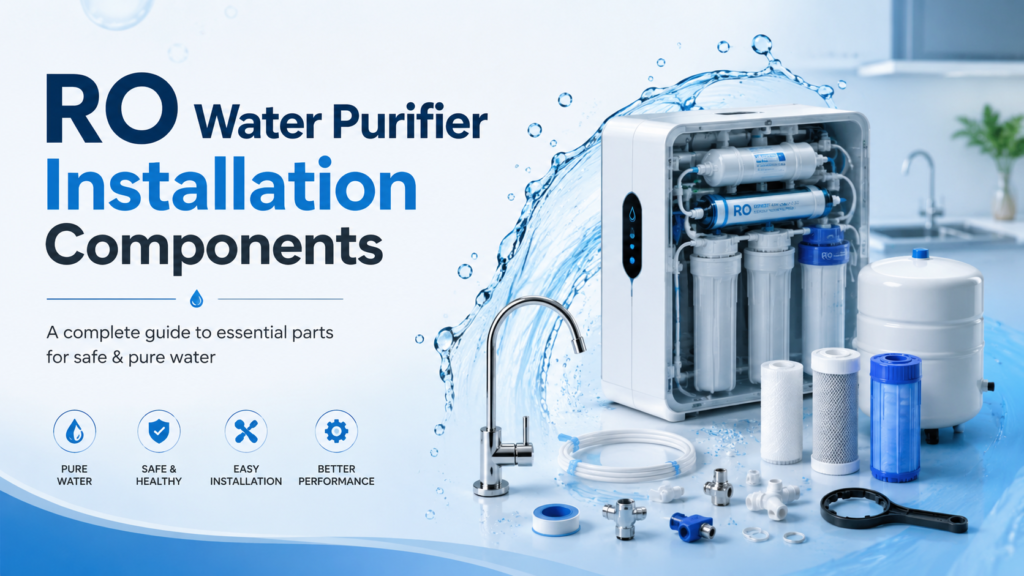 RO Water Purifier Installation Components Labeled diagram showing all components: main unit, storage tank, feed water adapter, drain saddle clamp, faucet, tubes, and clips RO Water Purifier Installation Components Labeled diagram showing all components: main unit, storage tank, feed water adapter, drain saddle clamp, faucet, tubes, and clips |
Before You Begin: Site Selection
The location of your RO purifier significantly impacts convenience, water pressure, and accessibility for maintenance. Follow these guidelines:
- Install under the kitchen sink or on an adjacent wall within 1.5 metres of the water inlet
- Mount the main unit at eye level or above for easy monitoring — avoid floor mounting
- Ensure a power socket is within 1 metre (the power adapter cable is typically 1.2m)
- Allow 30cm clearance below the unit for filter changes without removing the unit
- Keep away from heat sources (stove, direct sunlight)
- Ensure the waste water drain tube reaches the drain pipe (usually under the sink)
Understanding the Components
| Component | Function | Connection |
| Feed Water Adapter | Connects purifier to main water supply | Attached to cold water shut-off valve under sink |
| Main Purifier Unit | Houses all filter stages | Wall-mounted with included hardware |
| Storage Tank | Stores 7–12L purified water | Connected to purifier output with blue tube |
| Faucet / Tap | Dispenses purified water | Drilled into sink or countertop |
| Drain Saddle Clamp | Routes waste water to drain | Clamped onto drain pipe under sink |
| 4 Colour-Coded Tubes | Connect all components | Push-in fittings (no tools needed) |
Step-by-Step Installation Guide
Step 1: Shut Off Water Supply
Locate the cold water shut-off valve under your kitchen sink. Turn it clockwise to close. Open the existing tap to release any remaining pressure in the line.
Step 2: Install the Feed Water Adapter
Disconnect the cold water supply line from the shut-off valve. Install the feed water adapter (a T-junction saddle valve) between the valve and the supply line. Wrap all threaded connections with 2–3 layers of Teflon tape before tightening. Do not overtighten plastic fittings.
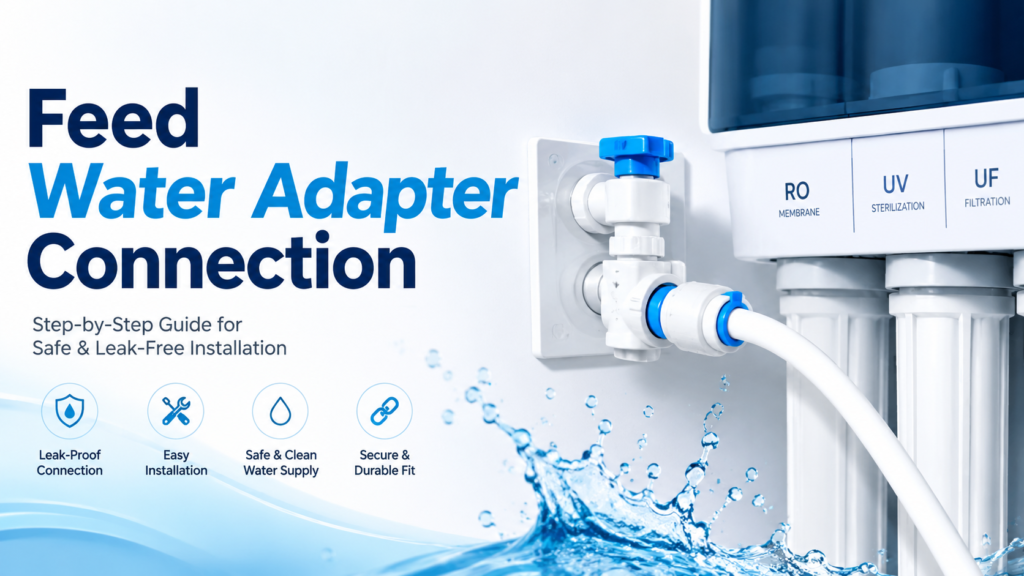 Feed Water Adapter Connection Close-up photo showing correct installation of saddle valve on cold water supply line with Teflon tape wrapping Feed Water Adapter Connection Close-up photo showing correct installation of saddle valve on cold water supply line with Teflon tape wrapping |
Step 3: Mount the Main Purifier Unit
Hold the mounting bracket against the wall at your chosen location. Mark the drill holes with a pencil. Use an 8mm drill bit to make holes, insert wall anchors, and screw the bracket firmly. Hang the purifier unit on the bracket. Verify it is level and stable before connecting tubes.
Step 4: Install the Faucet
Most kitchen sinks have a pre-drilled hole for an additional faucet. If not, you will need to drill a 25mm hole in the sink edge or countertop. Thread the faucet stem through the hole, add the rubber gasket and mounting nut beneath the sink, and tighten by hand then snug with pliers. Connect the yellow or black tube from the purifier output to the faucet inlet.
Step 5: Install the Drain Saddle Clamp
The drain clamp must be installed ABOVE the P-trap (the curved section under the sink) and below the sink body. Mark the position, drill a 6–8mm hole in the drain pipe, and attach the saddle clamp over this hole. The waste water tube from the purifier connects to this clamp. Ensure the tube has a continuous downward slope — no upward loops.
Step 6: Connect the Storage Tank
Place the storage tank in a stable position — ideally elevated (on a shelf or bracket) to improve flow pressure. Connect the blue tube from the purifier storage port to the tank inlet valve. The tank typically has a pre-pressurised bladder; verify it is at 5–8 PSI using a tyre pressure gauge. Do not exceed 10 PSI.
Step 7: Connect All Tubes
| Tube Colour (Typical) | Connection | Notes |
| Blue | Feed water inlet to purifier | From feed water adapter |
| Yellow / White | Purifier output to storage tank | Treated water line |
| Red / Orange | Storage tank to faucet | Dispensing line |
| Black / Grey | Purifier drain to saddle clamp | Waste water line — must slope downward |
Push each tube firmly into the push-fit connectors until you feel a click. Gently tug to confirm secure connection. Colour coding may vary by brand — always consult your specific installation manual.
Step 8: First Run and Testing
- Turn on the water supply valve slowly
- Check all connections for leaks — dry the area first so any drops are visible
- Let the first full tank fill and DISCARD it (flushes manufacturing residue)
- Fill and discard a second time for carbon filter flushing
- Test the water from the third fill with a TDS meter
- Verify waste water is flowing through the drain line
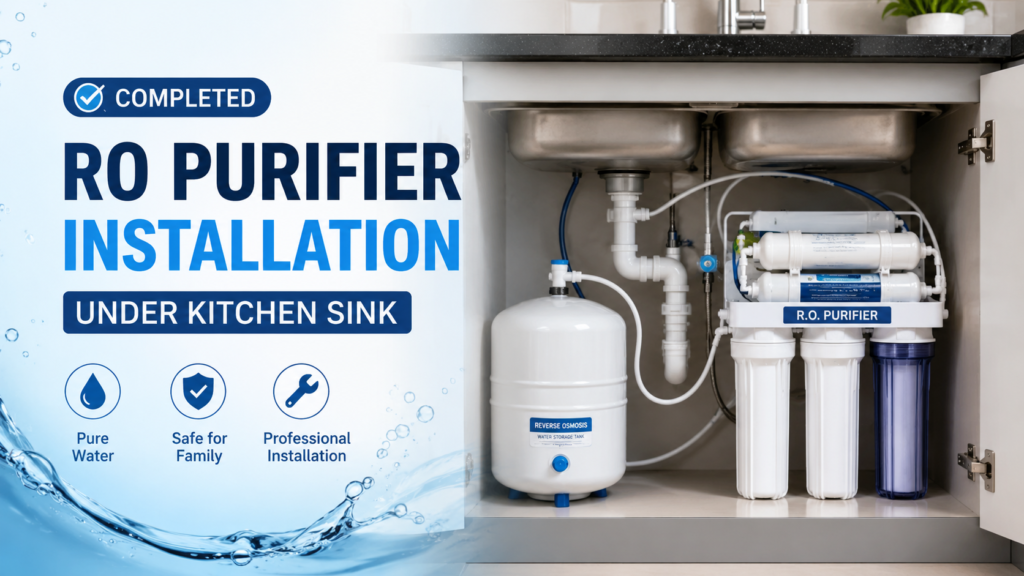 Completed RO Purifier Installation Under Kitchen Sink Clean installation showing all components properly mounted with neat tube routing and no visible leaks Completed RO Purifier Installation Under Kitchen Sink Clean installation showing all components properly mounted with neat tube routing and no visible leaks |
Common Installation Mistakes to Avoid
- Forgetting Teflon tape on threaded connections (causes slow leaks)
- Installing drain tube with upward loops (causes backflow and contamination)
- Mounting unit too low (obstructs filter access during maintenance)
- Not flushing the first two tanks of water (carbon fines in water)
- Overtightening plastic push-fit connectors (cracks the fittings)
- Skipping the feed water shut-off valve test before starting
Frequently Asked Questions (FAQ)
Schema Markup Note: Implement the FAQPage schema (JSON-LD) for Google rich results and AI Overviews eligibility.
Can I install an RO water purifier without a plumber?
Yes, most modern RO purifiers use push-fit tube connectors that require no special tools beyond a drill for mounting and the drain hole. The process takes 2–3 hours for a first-timer. However, if you are not confident with basic plumbing or your home has non-standard plumbing, professional installation is worth the cost.
What water pressure is needed for RO purifiers?
Most RO purifiers require inlet water pressure of 40–80 PSI (2.8–5.5 bar) to function optimally. If your water pressure is below 40 PSI, the purifier may purify slowly or trigger the low-pressure cutoff. A booster pump (sold separately, Rs 800–2,000) can solve low pressure issues.
My purifier is leaking from the tube connections. What do I do?
Push-fit leaks usually mean the tube is not fully inserted. Turn off water, depressurise by opening the faucet, then firmly push the tube back in until you hear/feel a click. If the connector body is cracked (often from overtightening), replace the fitting. Always have spare push-fit connectors available.
How long does first-time installation take?
An experienced plumber typically completes installation in 30–60 minutes. For a DIY first-timer following this guide carefully, expect 2–3 hours. The most time-consuming step is usually the faucet installation (if a new hole needs to be drilled) and getting all tube connections leak-free.
Related Articles (Internal Links)
- Ultimate Guide to Water Purifier 2026 (Pillar Blog)
- RO Water Purifier Maintenance: Complete Annual Guide
- Best RO Water Purifier in India 2025 (Buyer’s Guide)
- How to Remove Hardness From Drinking Water at Home
- TDS Level in Drinking Water: What Is Safe? (India Guide)